Bump mapping
From Wikipedia, the free encyclopedia
|
|
This article may require copy-editing for grammar. You can assist by editing it now. A how-to guide is available. (January 2009) |
|
|
This article requires authentication or verification by an expert. Please assist in recruiting an expert or improve this article yourself. See the talk page for details. (July 2008) |


Bump mapping is a computer graphics technique where at each pixel, a perturbation to the surface normal of the object being rendered is looked up in a heightmap and applied before the illumination calculation is done (see, for instance, Phong shading). The result is a richer, more detailed surface representation that more closely resembles the details inherent in the natural world. Normal mapping is the most commonly used bump mapping technique, but there are other alternatives, such as parallax mapping.
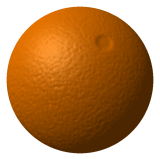
The difference between displacement mapping and bump mapping is evident in the example images; in bump mapping, the normal alone is perturbed, not the geometry itself. This leads to artifacts in the silhouette of the object (the sphere still has a circular silhouette).
Contents |
[edit] Bump mapping basics
Bump mapping is a computer graphics technique that aims to make a rendered surface look more realistic by modeling the interaction of a bumpy surface texture with lights in the environment. Bricks are a common bump mapped texture. Bump mapping does this by changing the brightness of the pixels on the surface in response to a heightmap that is specified for each surface.
When rendering a 3D scene, the brightness and colour of the pixels on the screen are determined by the interaction of the specified 3D model with lights in the scene. After the geometry calculation determines that an object is visible and should be displayed, trigonometry is used to calculate the 'geometric' surface normal of the object, defined as a vector at each pixel position on the object.
In the absence of bump mapping the geometric surface normal then defines how strongly the object interacts with light coming from a given direction using Phong shading or a similar lighting algorithm. In essence, light traveling perpendicular to the surface interacts with it most strongly while light parallel to the surface does not interact with it at all and the surface appears black. After the initial geometry calculations, a coloured texture is often applied to the model to make the object appear more realistic but this has no effect on the bump mapping process.
After texturing, a calculation is performed at each pixel on the object's surface:
- the renderer looks up the heightmap corresponding to that position on the surface,
- then uses further trigonometry to calculate the surface normal of the heightmap,
- adds the bump map surface normal from step 2 to the geometric surface normal (also known as perturbing the surface normal) so that the normal points in a new direction
- calculates the interaction of the new 'bumpy' surface with lights in the scene using, for example, Phong shading
The result is a surface that appears to have real depth, is more detailed and appears more similar to objects in the real world. Bump mapping also ensures that the surface appearance changes as lights in the scene move around, for example if the viewer is carrying a light source. Normal mapping is the most commonly used bump mapping technique, but there are other alternatives, such as parallax mapping.
The difference between displacement mapping, also known as 'true' bump mapping and 'fake' or '2D' bump mapping, which is more common and is often just called 'bump mapping' (see below), is that in fake bump mapping the normal alone is perturbed, not the geometry. In this case, the silhouette of the object is still defined by the underlying, often simple, geometry. In 'true' bump mapping the bumps are applied to the geometry, leading to a 'bumpy' silhouette. Fake bump mapping is computationally efficient and can be performed in real-time by 3D accelerator cards while true bump mapping is generally reserved for off-line (non-realtime) ray-traced images.
For the purposes of rendering in real-time bump mapping is often referred to as a 'pass', as in multi-pass rendering and can be implemented as multiple passes (often three or four) to reduce the number of trigonometric calculations that are required.
[edit] Fake bump mapping
Programmers of 3D graphics sometimes use a computationally lower quality, fake bump mapping technique in order to simulate bump mapping. One such method uses texel index alteration instead of altering surface normals, often used for '2D' bump mapping. As of GeForce 2 class cards this technique is implemented in graphics accelerator hardware.
Full-screen 2D fake bump mapping, which could be easily implemented with a very simple and fast rendering loop, was a common visual effect when bump-mapping was first introduced.
[edit] Environment Mapped Bump Mapping

The Matrox G400 chip supports, in hardware, a texture-based surface detailing method called Environment Mapped Bump Mapping (EMBM). It was originally developed by BitBoys Oy and licensed to Matrox. EMBM was first introduced in DirectX 6.0.
The Radeon 7200 also includes hardware support for EMBM, which was demonstrated in the tech demo "Radeon's Ark". However, EMBM was not supported by other graphics chips such as NVIDIA's GeForce 256 through GeForce 2, which only supported the simpler Dot-3 BM. Due to this lack of industry-wide support, and its toll on the limited graphics hardware of the time, EMBM only saw limited use during G400's time. Only a few games supported the feature, such as Dungeon Keeper 2 and Millennium Soldier: Expendable.
EMBM initially required specialized hardware within the chip for its calculations, such as the Matrox G400 or Radeon 7200. It could also be rendered by the programmable pixel shaders of later DirectX 8.0 accelerators like the GeForce 3 and Radeon 8500.
[edit] References
- Blinn, James F. "Simulation of Wrinkled Surfaces", Computer Graphics, Vol. 12 (3), pp. 286-292 SIGGRAPH-ACM (August 1978)
[edit] See also
[edit] External links
- http://www.blacksmith-studios.dk/projects/downloads/bumpmapping_using_cg.php Bump Mapping tutorial using CG and C++
- http://freespace.virgin.net/hugo.elias/graphics/x_polybm.htm (shows a simple creating vectors per pixel of a grayscale for a bump map to work and more)
- http://www.neilwallis.com/java/bump2.htm Bump Mapping example (Java applet)

